Last week I set out to finally build myself a web portfolio on my site — a task that has been delayed numerous times since I went more-or-less “full-time” last Fall. I knew I had to have screenshots, since those are one of the most important ways you can grab people’s attention before they resume totally ignoring you. But it can be hard to capture the essence of a dynamic web app in a single frame.
So I decided to embed GIFs of my web applications into my site! Not just any GIFs. You know what’s the worst? GIFs that load slowly and look bad. I knew I would need GIFs that:
- show my apps off nicely (nice image quality/minimal compression artifacts)
- download quickly
- are concise, and have well-thought-out starting and ending points.
There are plenty of paid applications out there to help pull this off, but why pay money when I can just use free tools in the Unix shell?
Commence the nerd quest.
Screencapturing with recordMyDesktop
Before I make a GIF from a screen recording I have to make the recording! It’s easy to do this on Linux using a command line tool called recordMyDesktop. There’s also a graphical frontend available called gtk-recordMyDesktop. To install them both with apt-get, use:
$ apt-get install recordmydesktop gtk-recordmydesktopIn order to initiate screencapture, run recordmydesktop. Use Alt+Tab to return to the terminal window when finished, and press Ctrl+C to stop capturing and begin encoding. The longer you record, the longer encoding lasts (and it can last awhile), so plan shots before recording!
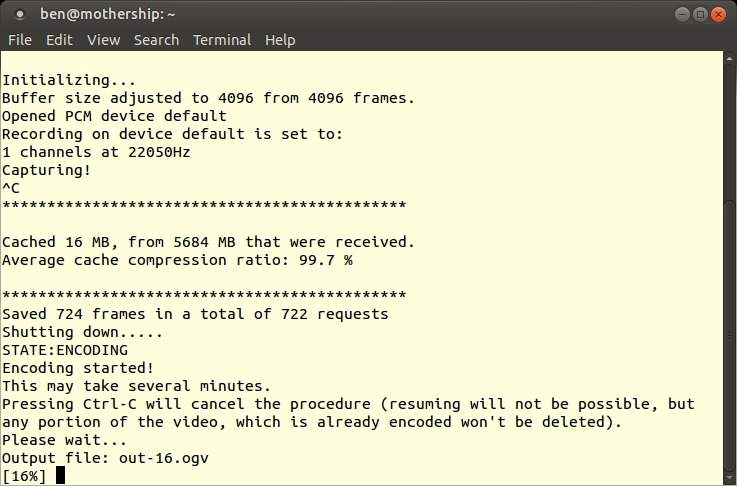
I capture recordings that last between one and four seconds, and I use the graphical version of recordMyDesktop. Since I don’t need sound, I disable it.
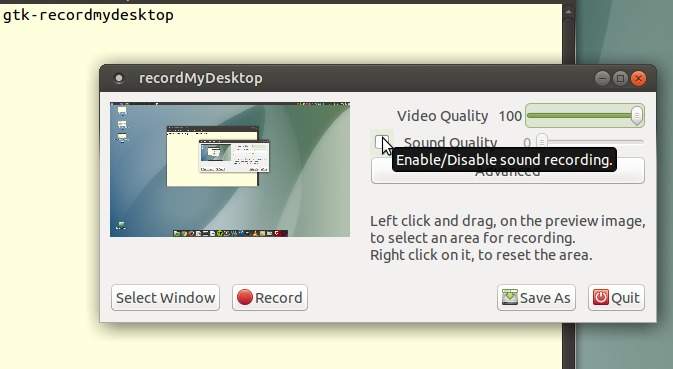
Don’t stop recording with Ctrl+C if you’re using the graphical version! You will lose your progress. Use the red stop button to finish recording.
On a Mac? QuickTime Player has a built-in function for recording your screen.
Separate video into frames
Next I need to separate my video into individual jpeg frames, which will become the GIF. On Linux a number of tools can accomplish this, but one is MPlayer - a movie player that has a command line interface. To install MPlayer I run:
$ apt-get install mplayerThen I output your frames into a new directory:
$ mplayer -ao null myscreencapture.ogv -vo jpeg:outdir=framesThe new directory will now contain each individual frame from the screencapture I created a moment ago. If anything needs to be trimmed off the beginning of end of your capture (or even the middle!), this is the time to delete those frames. I set the frames up so the player will start and end in a similar position (to help with the looping effect).
On a Mac? You can use the Unix utility MPlayer relies on, FFmpeg, to split your video into frames. This answer from Super User should help you out.
Crop frames
For the next few steps we’ll be using a tool called ImageMagick. It can be installed with:
$ apt-get install imagemagickMac users can download a simplified installer for ImageMagick here.
ImageMagick comes with a tool called mogrify that is able to powerfully batch-process images in ways that you would normally have to do one-at-a-time in visual image editors. Since I only want to keep a 860x860px area of my screencapture, I can use mogrify to crop each of my frames in the same place. Doing this job without the command line could take hours, if not days!
I need to open one of my frames up in an image editor like GIMP so I can find the X and Y coordinates of the top-left corner of my capture area.
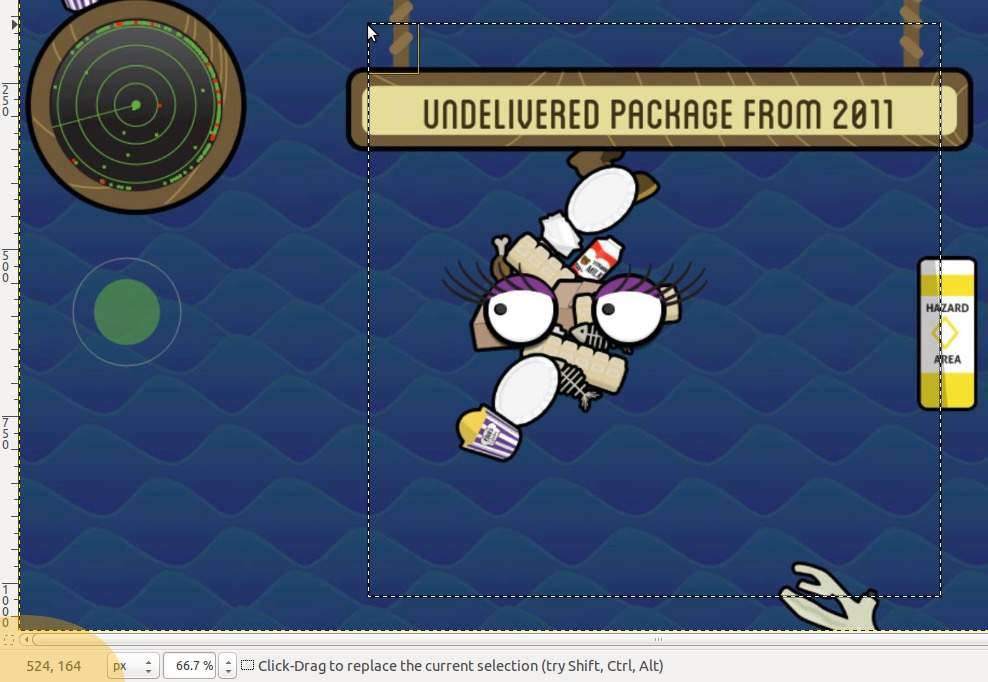
Once I find those coordinates, I copy all my frames to a fresh directory (to be safe) and then crop them all in place:
$ mkdir cropped_frames
$ cp frames/* cropped_frames/
$ mogrify -crop 860x860+524+164 cropped_frames/*.*
All cropped!
Scale frames
We’re going to use mogrify again, but this time to scale our frames down a bit. I only want my final GIF to be about 300x300 pixels, so it can download in the browser more quickly. It’s unnecessary to be zoomed all the way in, and we’ll thank ourselves later when the smaller resolution means we don’t have to sacrifice as much image quality. GIFs can be expensive!
Let’s copy our frames (just to be safe again), then scale them in place:
$ mkdir scaled_frames
$ cp cropped_frames/* scaled_frames/
$ mogrify -scale 300x300 scaled_frames/*.*
Make a GIF!
We’re finally ready to make a GIF! This time we’re using ImageMagick’s convert command, which can do a lot of things, one of which is turn a bunch of frames into one GIF.
$ convert -delay 6 frames_crop_scaled/* animation.gifI set the -delay flag’s value to 6, or six hundredths of a second per frame. Flip that and do some math, and we get a framerate: 16.67 frames per second. That’s pretty close to 15 frames per second — recordMyDesktop’s output framerate (so our GIF should move just a tiny bit faster than real life). You can make that value smaller for a faster GIF, or larger for a slower one.
Optimize our GIF
Our GIF’s file size is now pretty small, thanks to cropping and scaling it earlier, but it could still be smaller. ImageMagick comes with tools for this too, but it’s difficult to find settings that won’t degrade the image quality a lot. For some types of footage (like people), that might be OK, but for a UI with solid swatches of color, that’s not ideal.
Instead, we’re going to use another command line tool called Gifsicle, which comes with some smart optimization settings that are simple to apply.
$ apt-get install gifsicleCheck the Gifsicle website (above) for Mac installation options, including Homebrew.
We’re going to limit our GIF to 256 colors, and use Gifsicle’s most advanced image optimization algorithm (you can try out reducing the color count even more to further reduce the file size).
$ gifsicle --colors 256 -O3 < animation.gif > animation_optimized.gif
Boom — a web-optimized GIF!
Follow me on Twitter and GitHub for more.
Links that helped me
[1] Blog tvlooy — Convert OGV to GIF
[2] grep Linux — Mogrify: scale and crop multiple images in one command
[3] parker higgins dot net — howto: create an animated gif from a video with command line tools (I actually found this after I’d finished writing this article, while looking for a Mac port of Gifsicle. He has a remarkably similar process to mine, so it’s worth checking out for the differences.)